In the previous blog post, you have dockerized your test automation project and Selenium Grid. In this bonus chapter, you are going to record scenario runs on Docker with Selenium Video image!
- Let’s Create and Configure Our Web Test Automation Project!
- Let’s Write Our Test Scenarios!
- Bonus: Recording Failed Scenario Runs in Ruby
- Let’s Configure Our Web Test Automation Project for Remote Browsers and Parallel Execution
- Let’s Dockerize Our Web Test Automation Project
- Bonus: Recording Scenario Runs on Docker with Selenium Video!
- Let’s Integrate Our Dockerized Web Test Automation Project with CI/CD Pipeline!
- Auto-Scaling and Kubernetes Integration with KEDA
Recording Scenario Runs on Docker with Selenium Video!
Selenium provides a Docker image to record test executions on Selenium nodes in Docker. You are going to configure your Docker compose file to utilize this feature. Note that Selenium Video Docker image is pretty new, so there are a few setbacks:
- Selenium Video image supports amd64 architecture only. So you can not use it on MacBooks with Apple Silicon or on Raspberry Pi, for example. The experimental seleniarm images do not have Selenium Video support currently, unfortunately.
- For each Selenium node, there has to be one and only one video container. So the mapping is 1:1.
- Every node needs to have only one browser instance, since video image records the desktop. You can not specifically record an application separately.
- The whole test run is recorded as one video. So you can not have individual videos of each test scenario.
- The recording starts right after the browser node is connected to the grid and it stops when the containers are terminated. It may result in long recordings having mostly empty desktop scenes.
I am going to use my Windows machine throughout this walkthrough since its CPU supports Selenium Video image.
Since you are going to use official Selenium images, you need to change the following lines in your seleniarm based compose file, which you created in part 4:
- Changing selenium-hub image: seleniarm/hub => selenium/hub
- Changing chrome image: seleniarm/node-chromium => selenium/node-chrome
- And adding Video image to your file as shown below:
chrome_video:
   image: selenium/video
   volumes:
     - ./videos:/videos
   depends_on:
     - chrome
   environment:
     - DISPLAY_CONTAINER_NAME=chrome
     - FILE_NAME=chrome_video.mp4
Here, `volumes:` section lets you have a copy of the files created in the docker container in your host machine. The first directory is the host directory and the second one is the container’s directory. So when the video container is terminated, the video file in the /videos directory of the container will be copied to your specified directory. In this case, it will create a video folder in the directory of your compose file.
So your final compose file looks like this:
version: "3"
services:
 selenium-hub:
     image: selenium/hub
     container_name: selenium-hub
     ports:
       - "4442:4442"
       - "4443:4443"
       - "4444:4444"
     networks:
       - dockerize-network
 chrome:
   image: selenium/node-chrome
   shm_size: 2gb
   depends_on:
     - selenium-hub
   environment:
     - SE_EVENT_BUS_HOST=selenium-hub
     - SE_EVENT_BUS_PUBLISH_PORT=4442
     - SE_EVENT_BUS_SUBSCRIBE_PORT=4443
     - SE_NODE_MAX_INSTANCES=4
     - SE_NODE_MAX_SESSIONS=4
     - SE_NODE_SESSION_TIMEOUT=180
   networks:
     - dockerize-network
 chrome_video:
   image: selenium/video
   volumes:
     - /tmp/videos:/videos
   depends_on:
     - chrome
   environment:
     - DISPLAY_CONTAINER_NAME=chrome
     - FILE_NAME=chrome_video.mp4
 dockerize-network:
   name: dockerize-network
   driver: bridge
Note that I have removed firefox node from the compose file since my Windows machine is not powerful enough :D You can leave it as it is if you want.
Now you can start execution!
- Start the grid with `docker compose -f docker-compose-selenium.yml up` command.
- Run your web project via `docker run --network dockerize-network muhammettopcu/dockerize-ruby-web:1.0`
- After the execution, terminate your grid with the `docker compose -f docker-compose-selenium.yml down` command.
Then you will see that your video is now available in the folder you stated!

Now the thing is, as the number of scenarios in your project grows, this video will also grow and it would be hard to find individual scenarios. And I have a solution for this. You are going to split this video with ffmpeg software!
First, you are going to create a bash file for this purpose, and then dockerize it!
Splitting Video to Individual Parts with ffmpeg
First let’s examine your video:
- The video starts with an empty desktop like below:

- Then, when a scenario run starts, your browser shows up.
- And between the scenario runs, you see this black screen again.
So here is the algorithm to find the beginning and the ending of all test scenarios:
- Take a screenshot of the first frame of your video, which is basically a screenshot of your container’s desktop.
- Find every frame resembling this frame throughout the video.
- Compare every frame with the next frame. If the time difference between these two frames is bigger than 1 second, then it means the first frame is the beginning of a scenario and the second one is the ending of it.
- Get a list of all beginning and ending frames.
- Split the video according to these timestamps.
First things first: you are going to use ffmpeg to process your video. Install it.
brew install ffmpeg
Brew!? Why brew? Wasn’t I working on a Windows machine? Yes, I am going to run this docker image on my Windows machine but I will develop it on my Mac! That’s the power of Docker!
Now, make sure that your bash is updated. For installing the newer bash version, follow this article.
And finally, install bc (basic calculator) to make arithmetic operations in bash. You are going to need it.
brew install bc
Before you start, you might want to grab your favourite beverage. It will be a long walkthrough :)
Let’s create an empty file with your preferred text editor. You are going to write a shell script!
#!/bin/bash

#Take the screenshot of the first frame of the video
ffmpeg -i /Users/muhammettopcu/Desktop/video_edit/chrome_video.mp4 -vframes 1 /Users/muhammettopcu/Desktop/video_edit/screenshot.png
fi
The above code let’s us take a screenshot of the first frame of your video:
- #!/bin/bash makes your system regard this file as a shell script.
- /Users/muhammettopcu/Desktop/video_edit/chrome_video.mp4 is the path of your video file.
- /Users/muhammettopcu/Desktop/video_edit/screenshot.png is the path where the screenshot will be saved.
#Get the list of all frames resembling the image with a %85 ratio
ffmpeg -i /Users/muhammettopcu/Desktop/video_edit/chrome_video.mp4 -loop 1 -i /Users/muhammettopcu/Desktop/video_edit/screenshot.png -an -filter_complex "blend=difference:shortest=1,blackframe=85:32" -f null - > /Users/muhammettopcu/Desktop/video_edit/output.txt 2>&1
This is one of the most critical lines. It gets every frame of your video file and blends it with the screenshot that you have just taken. When two frames are blended together, if two identical pixels overlap, the result is a black pixel. There are two variables for this comparison:
- Amount: The percentage of the pixels that have to be below the threshold; it is 85 for in this instance.
- Threshold: The threshold below which a pixel value is considered black; it is 32 in this example.
By changing these values, you can make more precise comparisons.
After filtering these similar pixels, you save them to file with /Users/muhammettopcu/Desktop/video_edit/output.txt path.
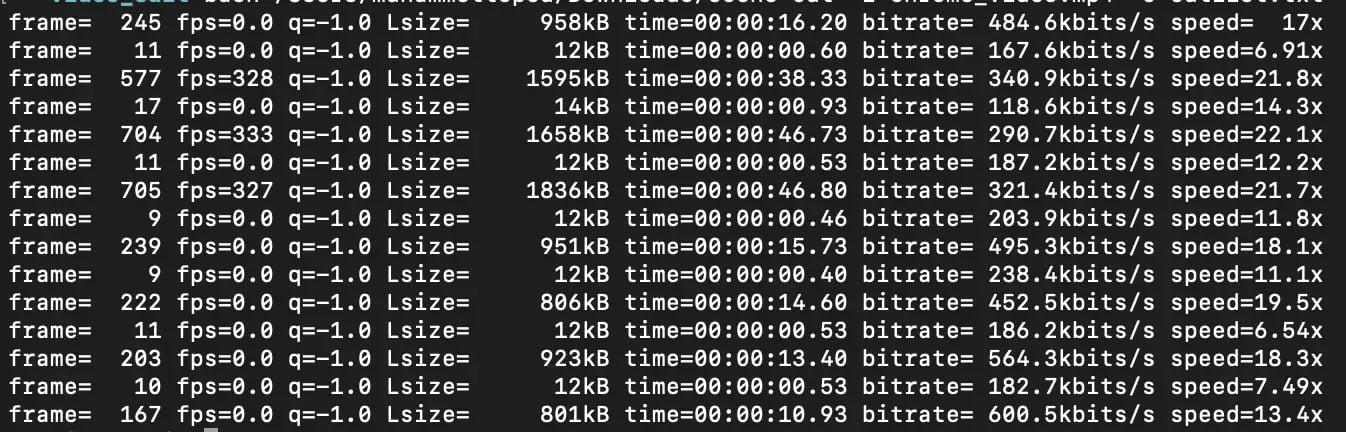
Here is a sample of what output.txt:
[Parsed_blackframe_1 @ 0x600000f2c0b0] frame:243 pblack:97 pts:1244160 t:16.200000 type:P last_keyframe:0
[Parsed_blackframe_1 @ 0x600000f2c0b0] frame:244 pblack:97 pts:1249280 t:16.266667 type:P last_keyframe:0
frame=  291 fps=193 q=-0.0 size=N/A time=00:00:19.33 bitrate=N/A speed=12.8x
frame=  397 fps=197 q=-0.0 size=N/A time=00:00:26.46 bitrate=N/A speed=13.2x
[Parsed_blackframe_1 @ 0x600000f2c0b0] frame:490 pblack:97 pts:2508800 t:32.666667 type:P last_keyframe:250
[Parsed_blackframe_1 @ 0x600000f2c0b0] frame:491 pblack:97 pts:2513920 t:32.733333 type:P last_keyframe:250
Here the “t:<SS.MS>” is the second that a frame is shown. "frame" indicates which frame it is.
So in this example, as you can see, there is not any blackframe between the 244th and 490th frames. Which basically means that between them, a scenario is executed!
So now, you need to process this file and get the timestamp of these blackframe pairs which have more than 1-second time difference between them!
file='/Users/muhammettopcu/Desktop/video_edit/output.txt'
regex='t:([0-9\.]+)'
detected='/Users/muhammettopcu/Desktop/video_edit/detected.txt'

global_rematch() {
   local file=$1 regex=$2
   timeStamps=()
   while IFS= read -r line; do
       [[ $line =~ $regex ]]
       if [[ "${BASH_REMATCH[1]}" == "" ]]; then
           :
       else
           timeStamps+=("${BASH_REMATCH[1]}")
       fi
   done < $file
}

global_rematch "$file" "$regex"
Note: In this blogpost, we had to use screenshots of the code snippets since some bash functions behaved unexpectedly in our website. You can copy the whole script from this link.
Let’s examine this code bit together:
- `file` is the location of your output.txt file.
- `regex` is the pattern of your frame time. It will catch every value after `t:` value of each frame. Check it here.
- `detected` is the file in which you will store these blackframe pairs.
- `global_rematch()` is a function that you try to match every line in your output.txt file with the regex pattern you have. If there is a match, you store the value of `t:` in an array called timeStamps.
So now you have an array filled with timestamps of these blackframes. The values inside timeStamps look like this => (... 16.200000 16.266667 32.666667 32.733333 …)
Now you need to compare these values and cherry-pick the pairs which have more than 1-second difference!
# Function to convert seconds to HH:MM:SS format using awk
seconds_to_hms() {
   local seconds=$1

   local hours=$(awk -v secs="$seconds" 'BEGIN { printf "%02d", int(secs / 3600) }')
   local minutes=$(awk -v secs="$seconds" 'BEGIN { printf "%02d", int((secs / 60) % 60) }')
   local seconds=$(awk -v secs="$seconds" 'BEGIN { printf "%06.3f", secs % 60 }')

   echo "$hours:$minutes:$seconds"
}
Before comparison, you need to convert the seconds to HH:MM:SS format. So you are going to use the above function for the elected timestamps to convert them.
Now let’s compare!

- Here you have a new array named newTime.
- You loop through every element (which are timestamps of each blackframe) of timeStamps array and compare them with the next frame’s timestamp by using bc. If the difference between them is more than 1, then it converts both time stamps into HH:MM:SS format by using seconds_to_hms function and append them to the newTime array!
# Write array elements to file
for element in "${newTime[@]}"; do
   echo "$element" >> "$detected"
   done
With the above code, you write each element of newTime array into the file named “detected.txt” The file looks like this:
00:00:16.267
00:00:32.667
00:00:33.467
00:01:12.000
00:01:13.133
00:02:00.000
00:02:00.733
00:02:47.667
00:02:48.333
00:03:04.200
00:03:04.800
00:03:19.600
00:03:20.267
00:03:33.867
00:03:34.600
00:03:45.667
And your bash script so far looks like this:

Now here, you are going to use two scripts created by a github user with a username NapoleonWils0n. The scripts you are going to use are:
- scene-time: Adds duration to the timestamps and creates a new file with this.
- scene-cut: Cuts the video according to the above-mentioned file.
You can download them from his directory.
So by running scene time, you will convert your time stamps <scene-start>,<scene-duration> duos. Run the script with the command below:
scene-time -i /Users/muhammettopcu/Desktop/video_edit/detected.txt -o /Users/muhammettopcu/Desktop/video_edit/cutlist.txt
In here,
* -i is input file’s path.
* -o is output files path.
After the execution, the cutlist file which is created by scene-time looks like below:
00:00:16.267,00:00:16.4
00:00:32.667,00:00:00.8
00:00:33.467,00:00:38.533
00:01:12,00:00:01.133
00:01:13.133,00:00:46.867
00:02:00,00:00:00.733
00:02:00.733,00:00:46.934
00:02:47.667,00:00:00.666
00:02:48.333,00:00:15.867
00:03:04.2,00:00:00.6
00:03:04.8,00:00:14.8
00:03:19.6,00:00:00.667
00:03:20.267,00:00:13.6
00:03:33.867,00:00:00.733
00:03:34.6,00:00:11.067
Now let’s run scene-cut script with the cutlist.txt file that you have created:
bash /usr/local/bin/scene-cut -i /Users/muhammettopcu/Desktop/video_edit/chrome_video.mp4 -c /Users/muhammettopcu/Desktop/video_edit/cutlist.txt Here:
* -i is input file’s path which is your video.
* -c is cutlist file’s path.
Now you can see that main video is split and separate videos are created according to time stamps:

But the thing is, as you can see from thumbnails, while every odd-numbered videos are actual test runs, the even-named ones are short videos containing only the desktop screen. Why is that?
Because the script named scene-cut creates videos for each time stamp, not for each pair of them.
Then you need to tweak the scene-cut script a little bit. Let’s open the script with a text editor. Below is the code creating videos.
#===============================================================================
# read file and set IFS=, read = input before , duration = input after ,
#===============================================================================

count=1
while IFS=, read -r start duration; do
 trim_video
 count="$((count+1))"
done < "${cutfile}"
Let’s modify it like below:
count=1
name=1
while IFS=, read -r start duration; do
 if [ $((count%2)) -eq 1 ];then
   trim_video
   name="$((name+1))"
 fi
 count="$((count+1))"
done < "${cutfile}"
With this modification, you skip all the lines that are multiples of two. And replace the `count` below with `name`, so even though you skip some of them, the videos are named correctly.
Before:
output="${input_name}-${count}.mp4"
After:
output="${input_name}-${name}.mp4"
Done. Let’s run again!

Now you can see that only 8 videos are created.

Everything works as intended!
You might have realised up to this point that I installed and configured everything on MacOS. And the video that I created via Selenium Video was on my host machine.
Do I need to repeat everything on every device to accomplish this? Not necessarily. All we need to do is dockerize this script. Then I can run it on my Windows machine without all this hassle!
Dockerizing Video Split Script
Let’s create a dockerfile.
FROM ubuntu:latest

RUN apt update && apt-get install -y ffmpeg && apt-get install -y bc

WORKDIR /usr/src/app

COPY . /usr/src/app

ENV PATH "$PATH:/usr/src/app"

CMD /usr/src/app/split-video-docker

EXPOSE 5000:5000
- Using ubuntu:latest base image for your script. You can use lightweight one if you want.
- Updating apt, install ffmpeg and bc with -y flags so that any prompt are answered as “yes”.
- Adding "/usr/src/app" to your path environment, so that you can run your scripts there.
- The first thing that will run when your container spins up is the “split-video-docker” script, which is your bash script.
But before building your image, you need to configure your “ split-video-docker ” according to container’s structure:
#!/bin/bash

#Find the video file
video_path=$(find /usr/src/app/video -type f -name "*.mp4")

#Take the screenshot of the first frame of the video
ffmpeg -i $video_path -vframes 1 /usr/src/app/video/screenshot.png

#Get the list of of all frames resembling to the image with %85 ratio
ffmpeg -i $video_path -loop 1 -i /usr/src/app/video/screenshot.png -an -filter_complex "blend=difference:shortest=1,blackframe=85:32" -f null - > /usr/src/app/video/output.txt 2>&1

file='/usr/src/app/video/output.txt'
regex='t:([0-9\.]+)'
detected='/usr/src/app/video/detected.txt'
Here you added video_path=$(find /usr/src/app/video -type f -name "*.mp4") line to find your video file in the on `/usr/src/app/video` directory of the container. I almost hear you saying “But the video file won’t be in the container but in your host machine!”. Indeed, that’s why you are going to mount a volume on it! But for now, bear with me 🙂
As you can see, the paths of each file are changed accordingly as well.
Note that all scripts will be located in the /usr/src/app directory and every file to be used with scripts or created via scripts will be in the /usr/src/app/video directory. Below you can find your image’s structure:
root@236a6678c313:/usr/src/app# where your script files are located
.
|-- dockerfile
|-- scene-cut
|-- scene-time
|-- split-video-docker
`-- video
    `-- chrome_video.mp4 #video file mounted with volume
Let’s continue:
scene-time -i /usr/src/app/video/detected.txt -o /usr/src/app/video/cutlist.txt

scene-cut -i $video_path -c /usr/src/app/video/cutlist.txt

rm /usr/src/app/video/cutlist.txt /usr/src/app/video/detected.txt /usr/src/app/video/output.txt /usr/src/app/video/screenshot.png
Here, the destinations are changed as well and the files other than the videos that get removed at the end of the script.
Next, in scene-cut script, let’s change the output path like this:
trim_video () {
   output="/usr/src/app/video/${input_name}-${name}.mp4"
   ffmpeg \
   -nostdin \
With this, you ensure that the split video files will be saved in the /usr/src/app/video/ directory.

The final bash script should look like this:

If everything is correct, let’s build your image. I am going to use buildx since I want this image to be compatible with both my MacOS M1 machine and Windows amd64 machine. You can change the platform according to your needs.
docker buildx build -t muhammettopcu/video-splitter:1.0 --push --platform linux/amd64,linux/arm64 .
With this, I build my images and push them to my repository on dockerhub.

Good, both of them pushed successfully. Now let’s try it on Windows!
The video file that I obtained by Selenium Video is in this location: C:\Users\muhammettopcy\Desktop\docker\videos
Now I am going to use -v command when I run my image since I want to bind this location with Docker container’s video location:
docker run -v C:\Users\muhammettopcy\Desktop\docker\videos:/usr/src/app/video muhammettopcu/video-splitter:1.0

It works! Now you can use your dockerized web project and this Docker image to get individual test run videos!
With this, this blog post is concluded! I hope you get a basic knowledge about manipulating video files according to your needs. Next, we are going to integrate a CI/CD pipeline to your Ruby Web Test Automation Project with Jenkins! See you soon! :)